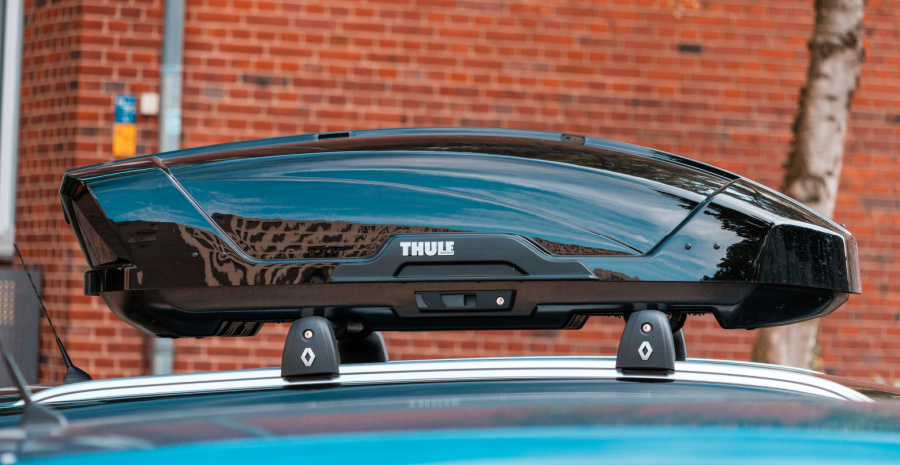
If you’ve ever packed for a camping trip, ski day, or beach vacation, you know the trunk fills up fast! Sleeping bags, boots, skis, camp chairs, strollers, beach umbrellas – you name it – suddenly your car feels less like a vehicle and more like a game of Tetris gone wrong.
That’s where a rooftop cargo box comes in to save the day! When you choose a Thule cargo box, you get extra storage so you can bring all the gear you need without sacrificing legroom (because let’s face it, nobody wants to ride 5 hours with a cooler on their lap).
But here’s the catch: cargo boxes come in different shapes, sizes, and capacities. And bigger isn’t always better. So how do you know which one is right for you?
Let’s break it down…
Step 1: Think About What You’re Storing
Start by deciding what’s going in the box. Rooftop cargo boxes are typically best for bulky but lightweight items like:
- Tents, sleeping bags, and pillows.
- Backpacks and hiking poles.
- Camp furniture and strollers.
- Skis, snowboards, and ski poles (keep boots in the car so they’re toasty warm).
- Beach gear or even kids’ toys.
Keep in mind: Heavy items, like coolers or water jugs, should stay inside your car. Cargo boxes have a weight limit, and you don’t want to max it out with a single cooler.
Step 2: Double-Check the Weight Capacity
Every vehicle has a maximum load limit. Check your owner’s manual for the exact number to figure out how much gear you can safely load. Once you have confirmed your vehicle’s weight capacity, choosing the right size for your cargo box becomes a much simpler process.
Some “math” to keep in mind: Your vehicle’s max load (weight of cargo box + crossbars + towers/feet) = amount of gear you can carry. Staying within this sweet spot will work in your favour.
Step 3: Pick the Right Dimensions
Cargo boxes come in a variety of different lengths, widths, and heights. Here’s how to narrow it down to choose the right one for you:
- Length: Longer boxes fit skis and snowboards. Shorter ones are fine if you’re just carrying tents or camping gear.
- Width: A wider box gives you more space, but it may block room for bikes or kayaks on the rack. Narrower boxes are better if you plan to carry multiple things up top.
- Height: Taller boxes = more gear. But keep in mind whether your garage, parking lot, or favourite drive-thru can still fit your newly raised roofline.
Step 4: Match Capacity to Your Crew
The number of passengers you’re traveling with usually determines how much cargo you’ll pack – and the more cargo you bring, the more storage space you’ll need.
Here are some quick cheat codes:
- 2 people → 12 cu. ft. / 340 litres
- 3 people → 15 cu. ft. / 425 litres
- 4 people → 18 cu. ft. / 510 litres
- 5 people → 21 cu. ft. / 595 litres
If you usually travel solo or as a couple, a smaller box will save money, fuel, and storage space. Bigger families (and/or heavy packers) will benefit from more room.
Step 5: Make Sure It Fits YOUR Vehicle
You may think this is an obvious step in the selection process, but surprisingly, this is where many people still slip up. You don’t want a box that prevents your hatch from opening or looks oversized on your car. To check for hatch clearance:
- Open your trunk fully.
- Measure from the centre of your front crossbar to where the hatch meets the roof.
- Compare this measurement to the “front clearance” listed in the cargo box manual.
If your measurement is bigger, you’re good to go. If not, you’ll need a shorter box or to adjust your crossbars forward, which we can help you decipher.
Other Things to Consider
- Looks matter (a little): Choose a size, colour, and finish that complements your vehicle. Black and silver tend to be the go-to classics.
- Fuel efficiency: The bigger the box, the more weight and drag your vehicle has to manage. Smaller boxes will save you money at the pump.
- Noise: Bigger boxes = more surface area = more wind noise. Something to keep in mind for long drives.
- Storage at home: Cargo boxes are awkward to stash. If you don’t have a big garage, a smaller one may be easier to manage.
Tips for Using Your Cargo Box Like a Pro
If you’re still not 100% sure how to effectively pack your cargo box or what the best approach is for the easiest trip, here are some tips:
- Pack light, bulky gear up top, heavy gear inside the car.
- Spread weight evenly – 60% between crossbars, 40% split front and back.
- Keep “must-have” items (snacks, smart tech, boots, etc.) inside the car for easy access.
- Always check height clearances at garages, parking lots, and drive-thrus.
- Close and lock the box before driving (sounds obvious, but it happens!).
- Check the mountings regularly during trips.
- Store your box in a cool, dry place when not in use – on its base, not its side.
The Bottom Line
Adding trusted rooftop cargo boxes like the brands Yakima or Thule is one of the easiest ways to transform road trips, camping weekends, ski days, and more. The trick is to choose the right size cargo box for your gear, your vehicle, and your lifestyle.
Not sure which one fits your adventures the best? Don’t stress – swing by The Calgary Hitch Shop today and our team will help check your hatch clearance, walk you through size options, and help you find the perfect box for your next adventure.


